Thursday 28 April 2011

Sexy Bright Purple Smokey Eyes

Hello!
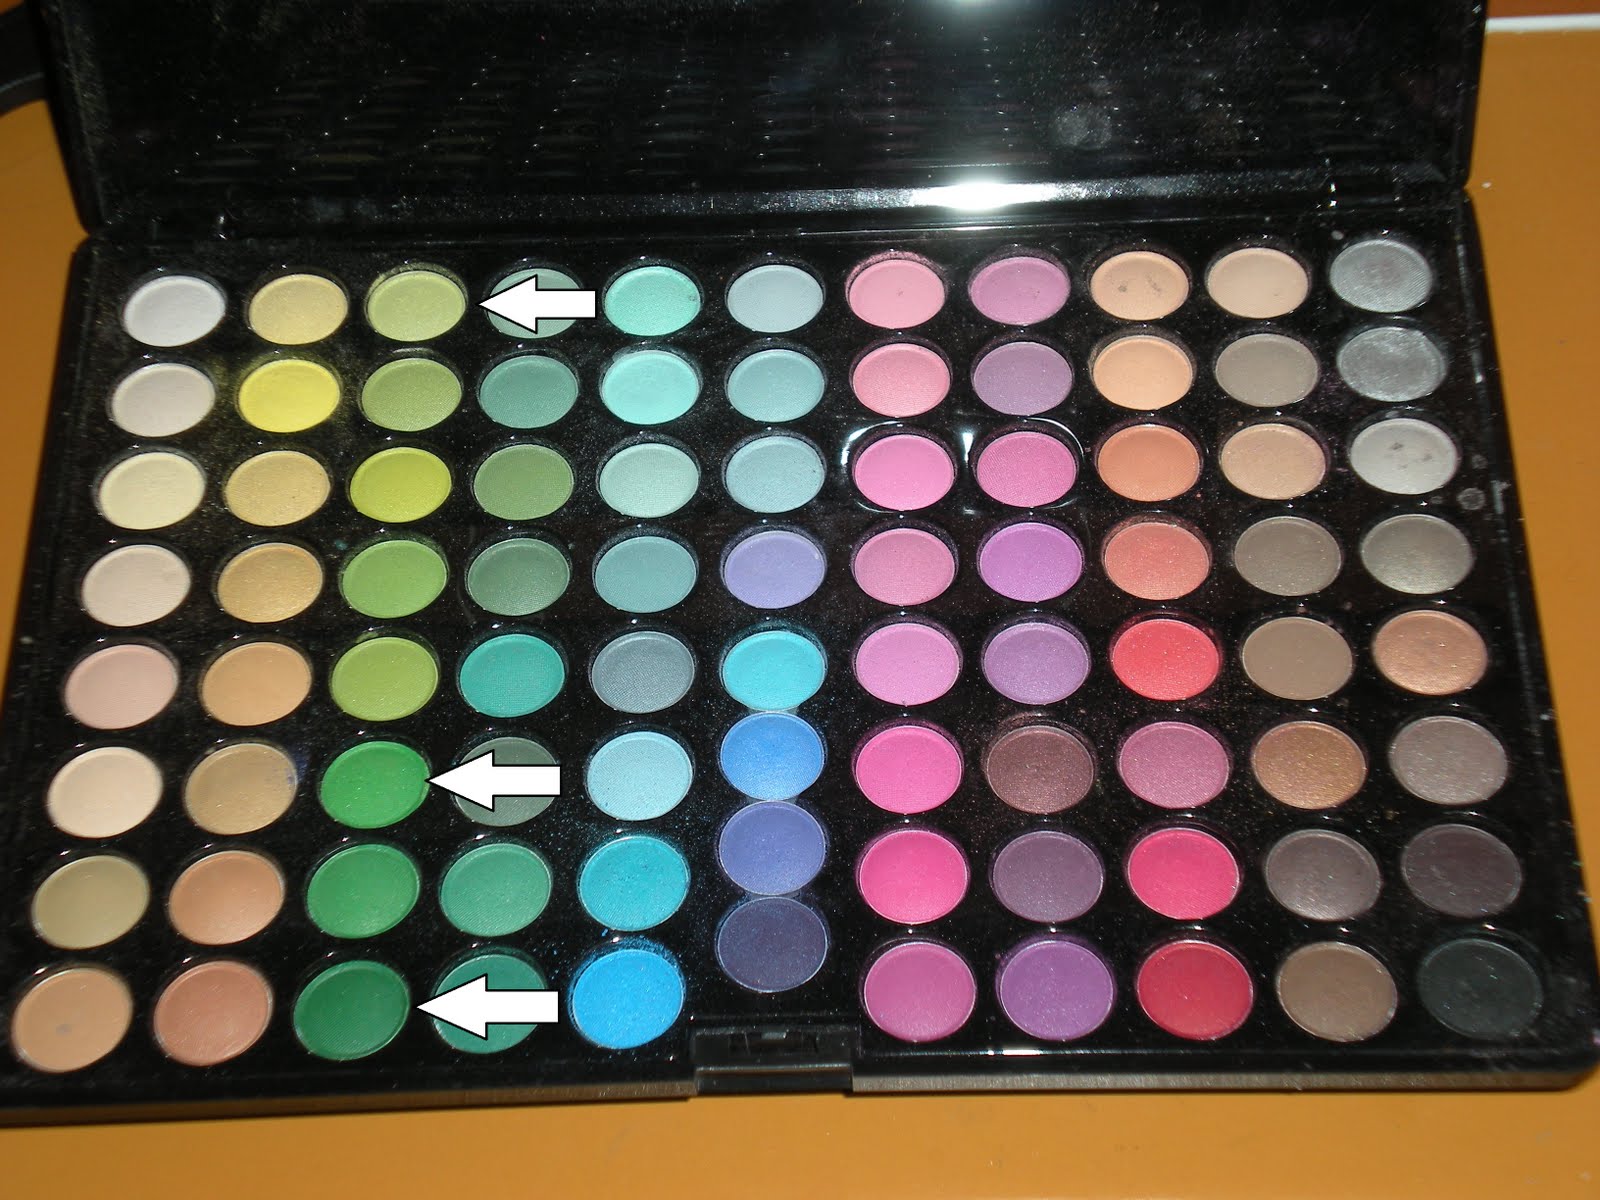
I am aware that I love the smokey eye and have done a lot of them since I started blogging...but I really had to show you this one! I have mentioned MANY times that I am not a fan of the colour pink (I can already hear some gasps) but I am very proud to say that I attempted using a very light pink shade as a highlight colour on my brown bone for a purple smokey eye! This is quite a feat for me as most of the pink shades in my coastal scents palettes are untouched as the colour pink and my green/hazel tend to clash.

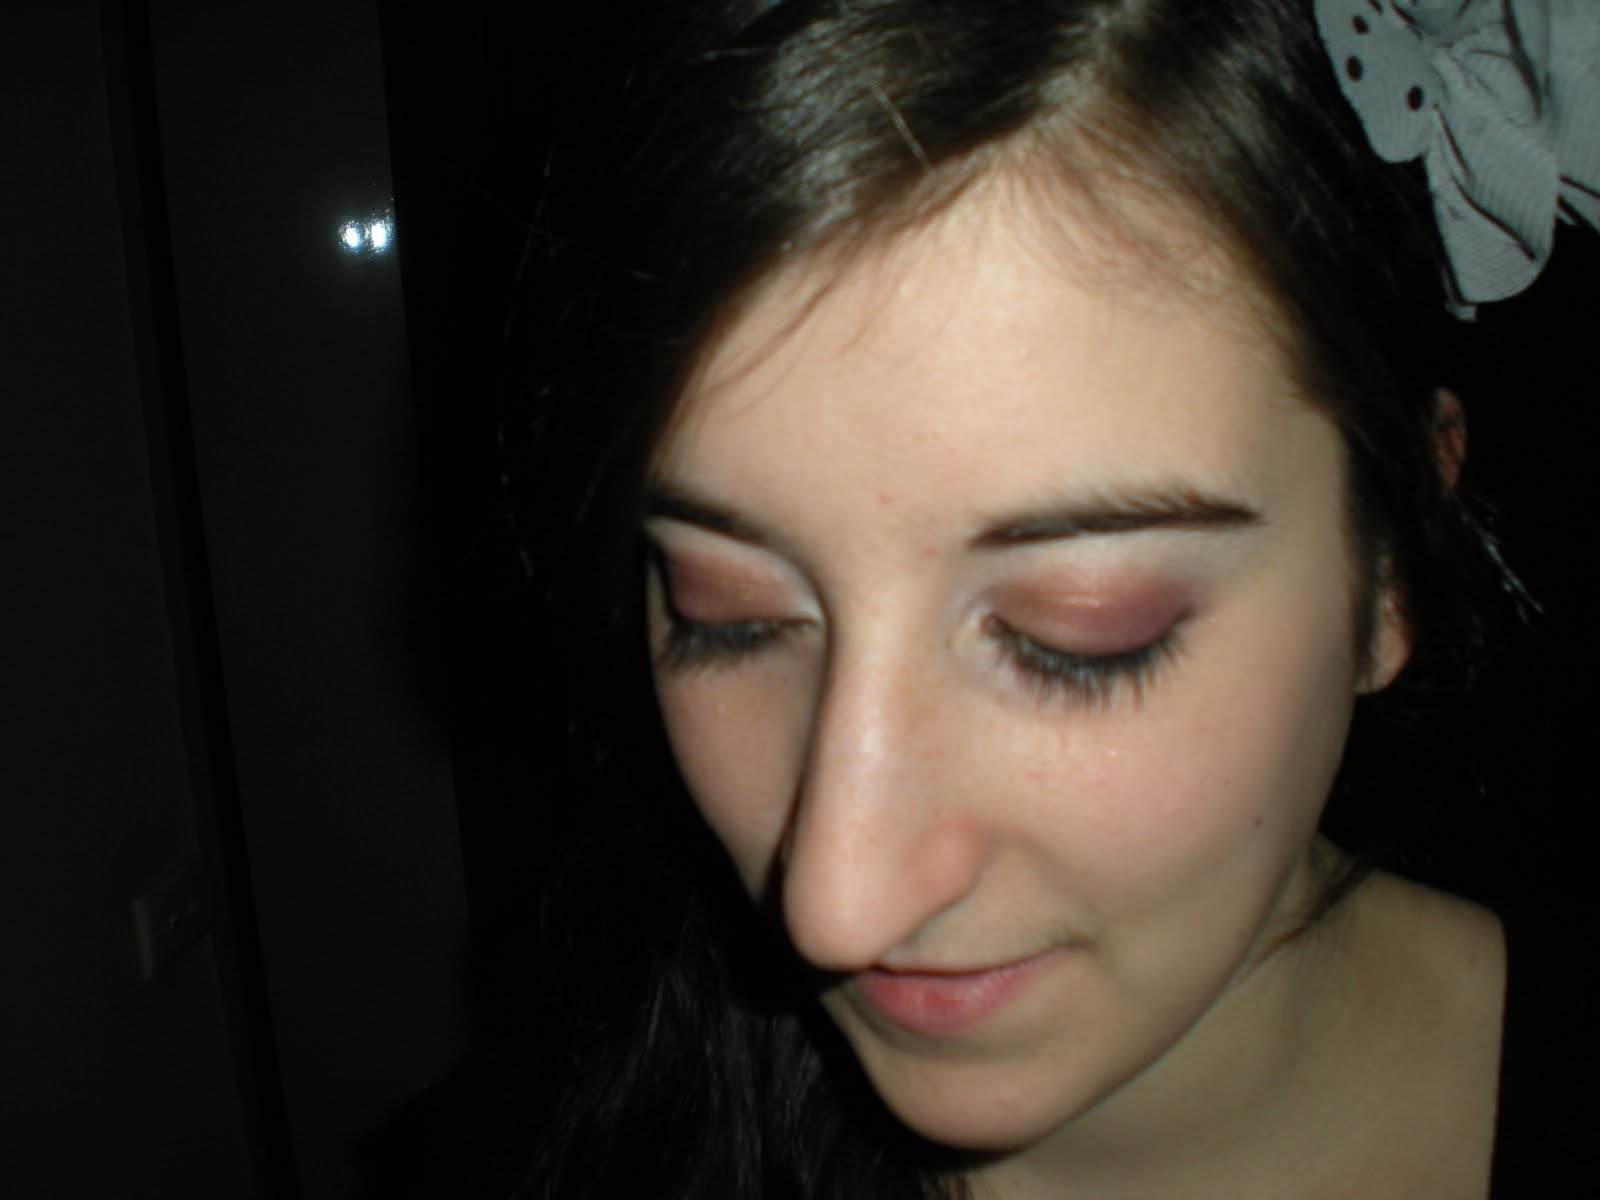
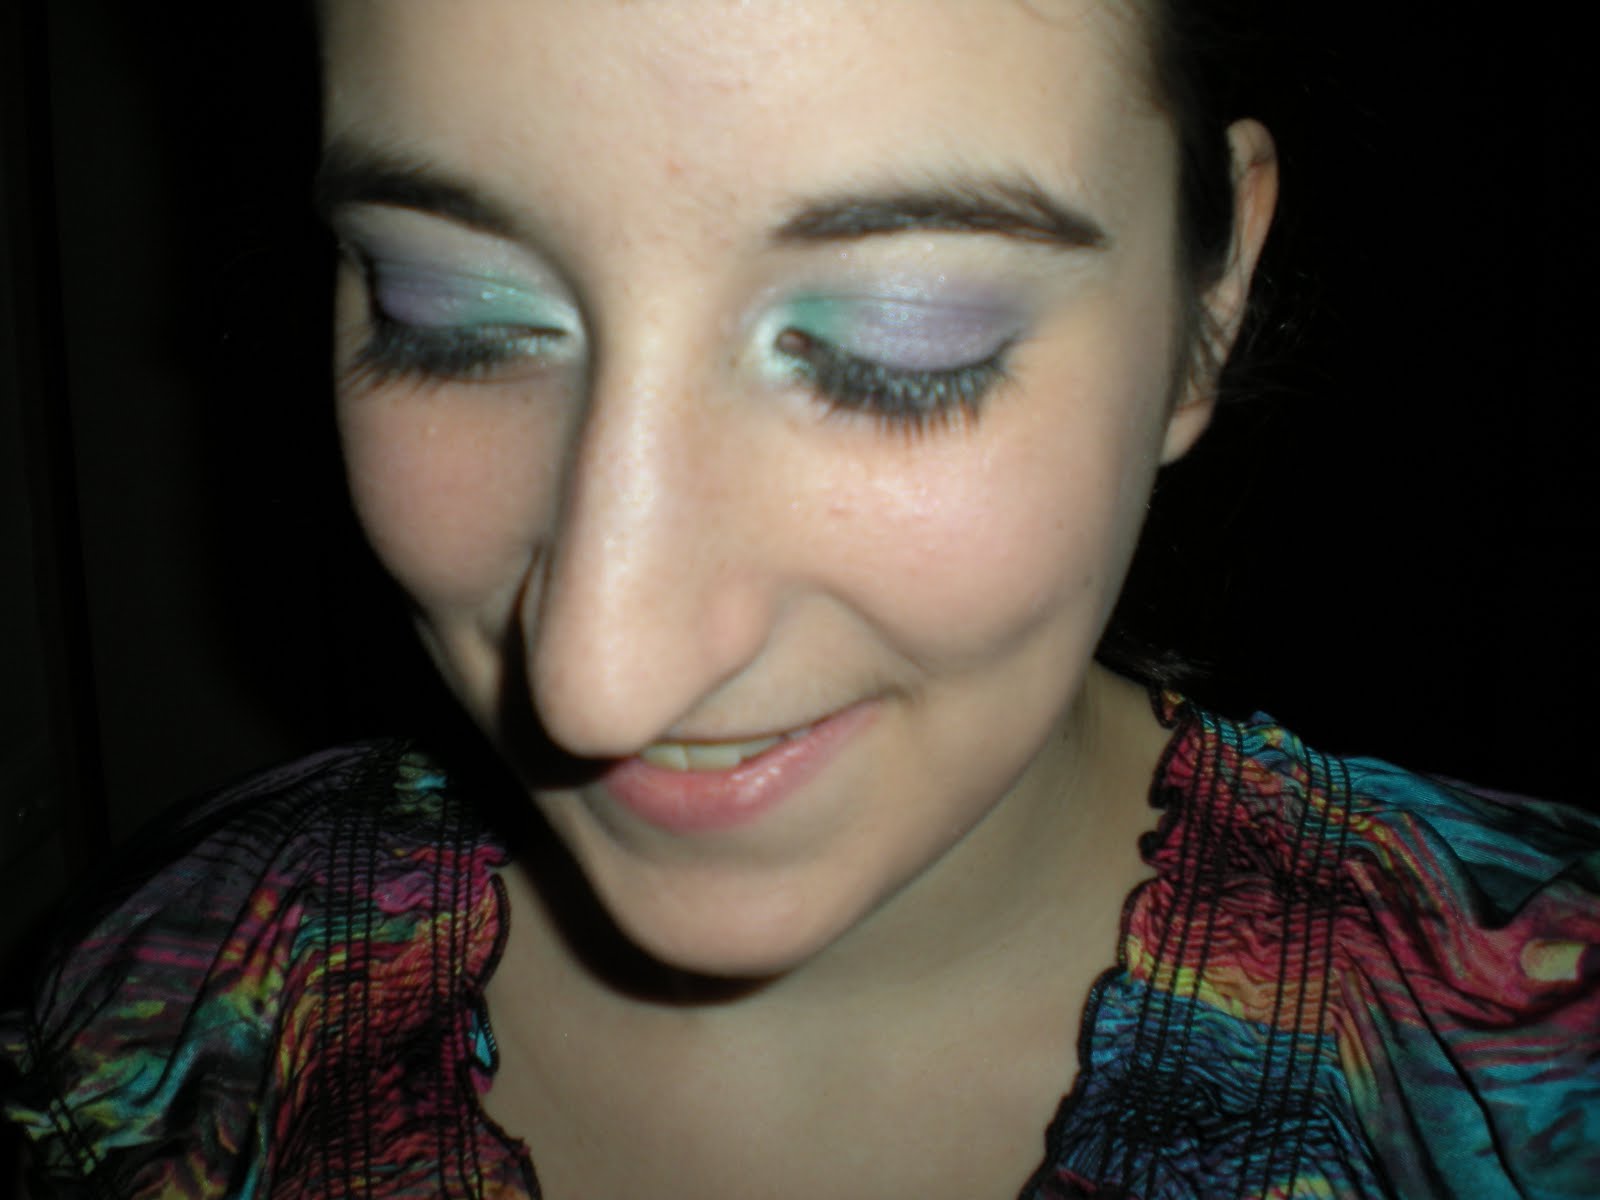
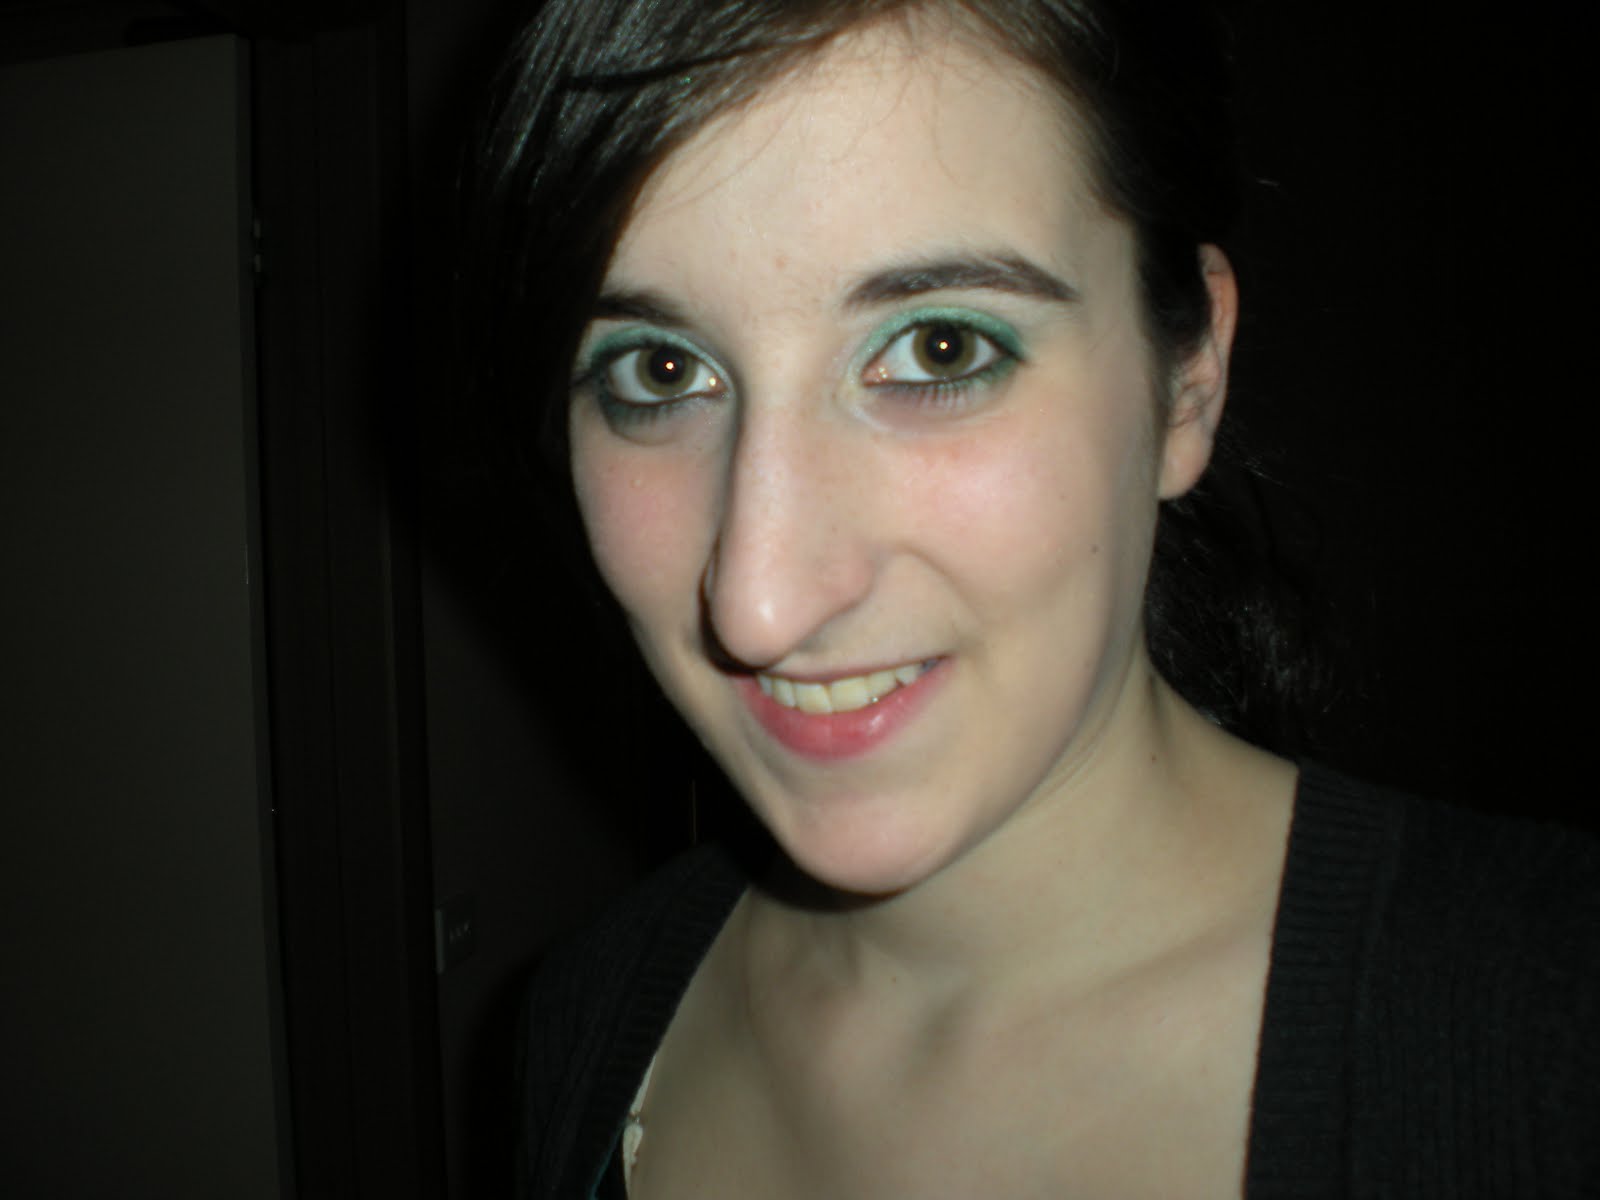
This is how it turned out...


The colours I used from my 88 coastal scents shimmer palette:
Yay! An arrow pointing in the 'pink' direction! This look is very similar to the 'icequeen' look I did a few weeks ago...so be sure to check that out if you would like to achieve this look. :)

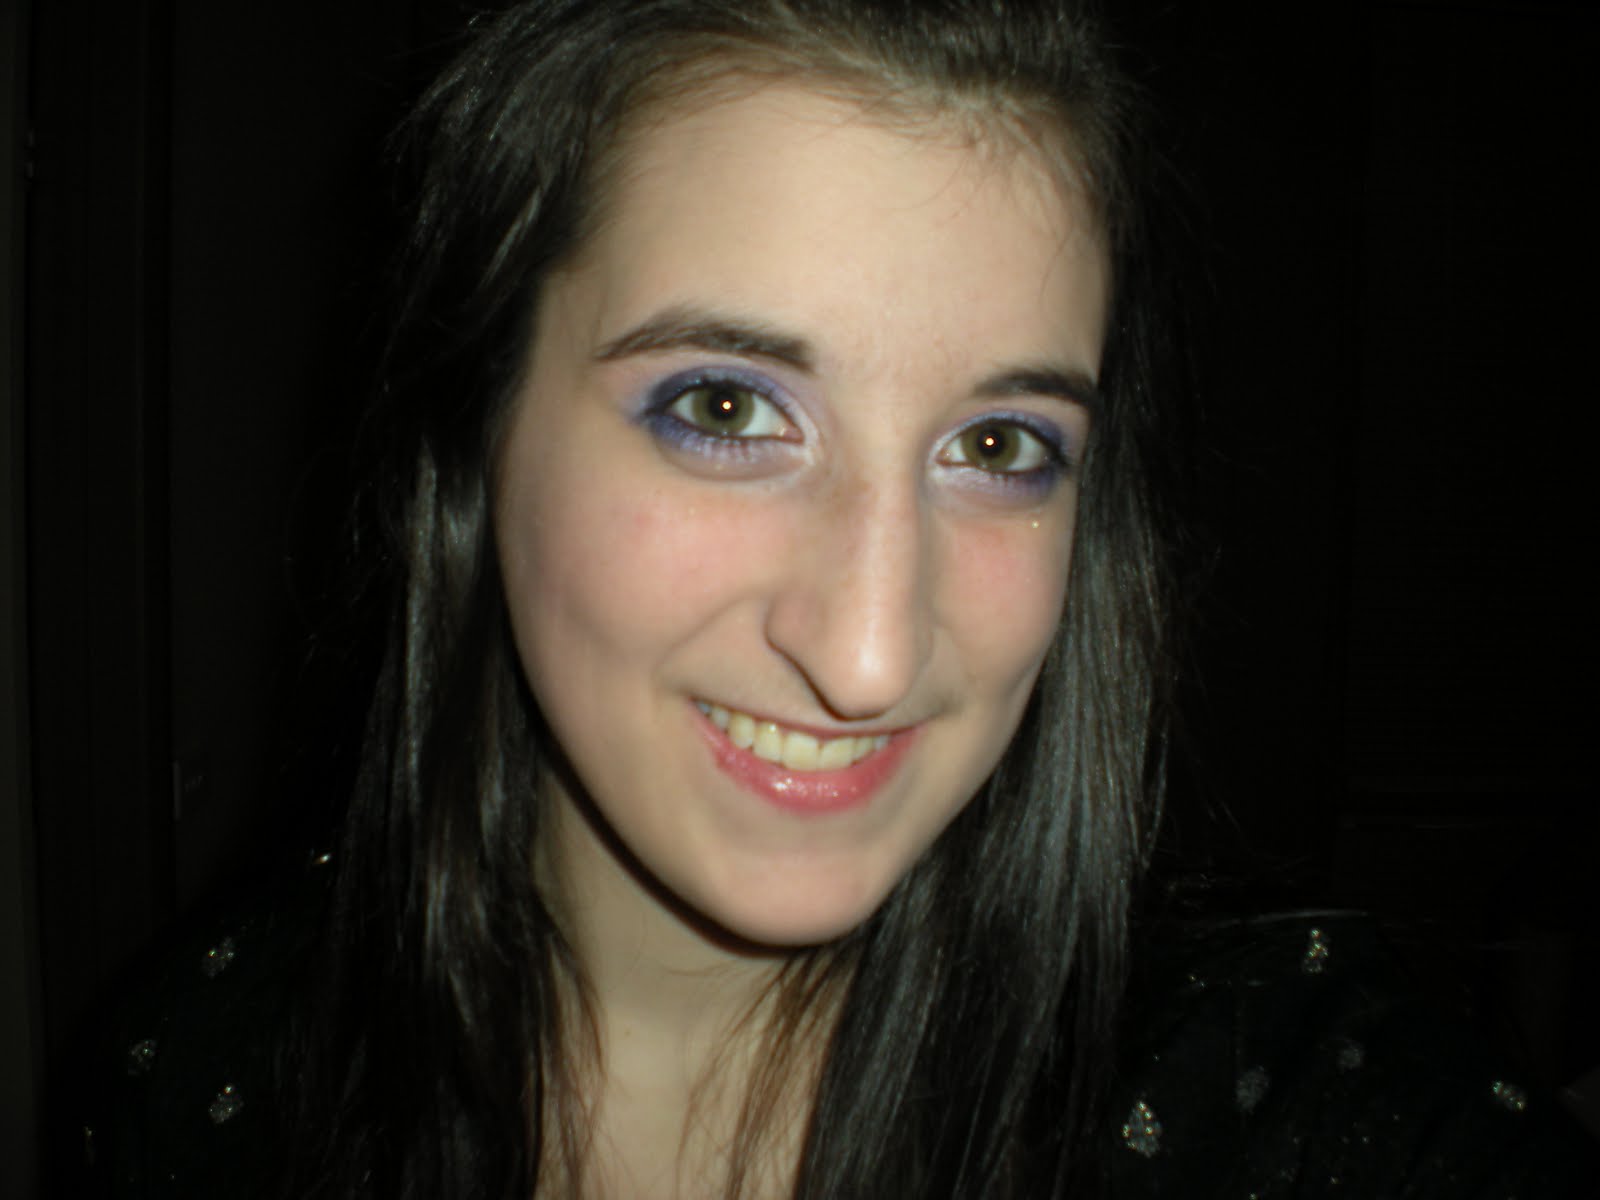
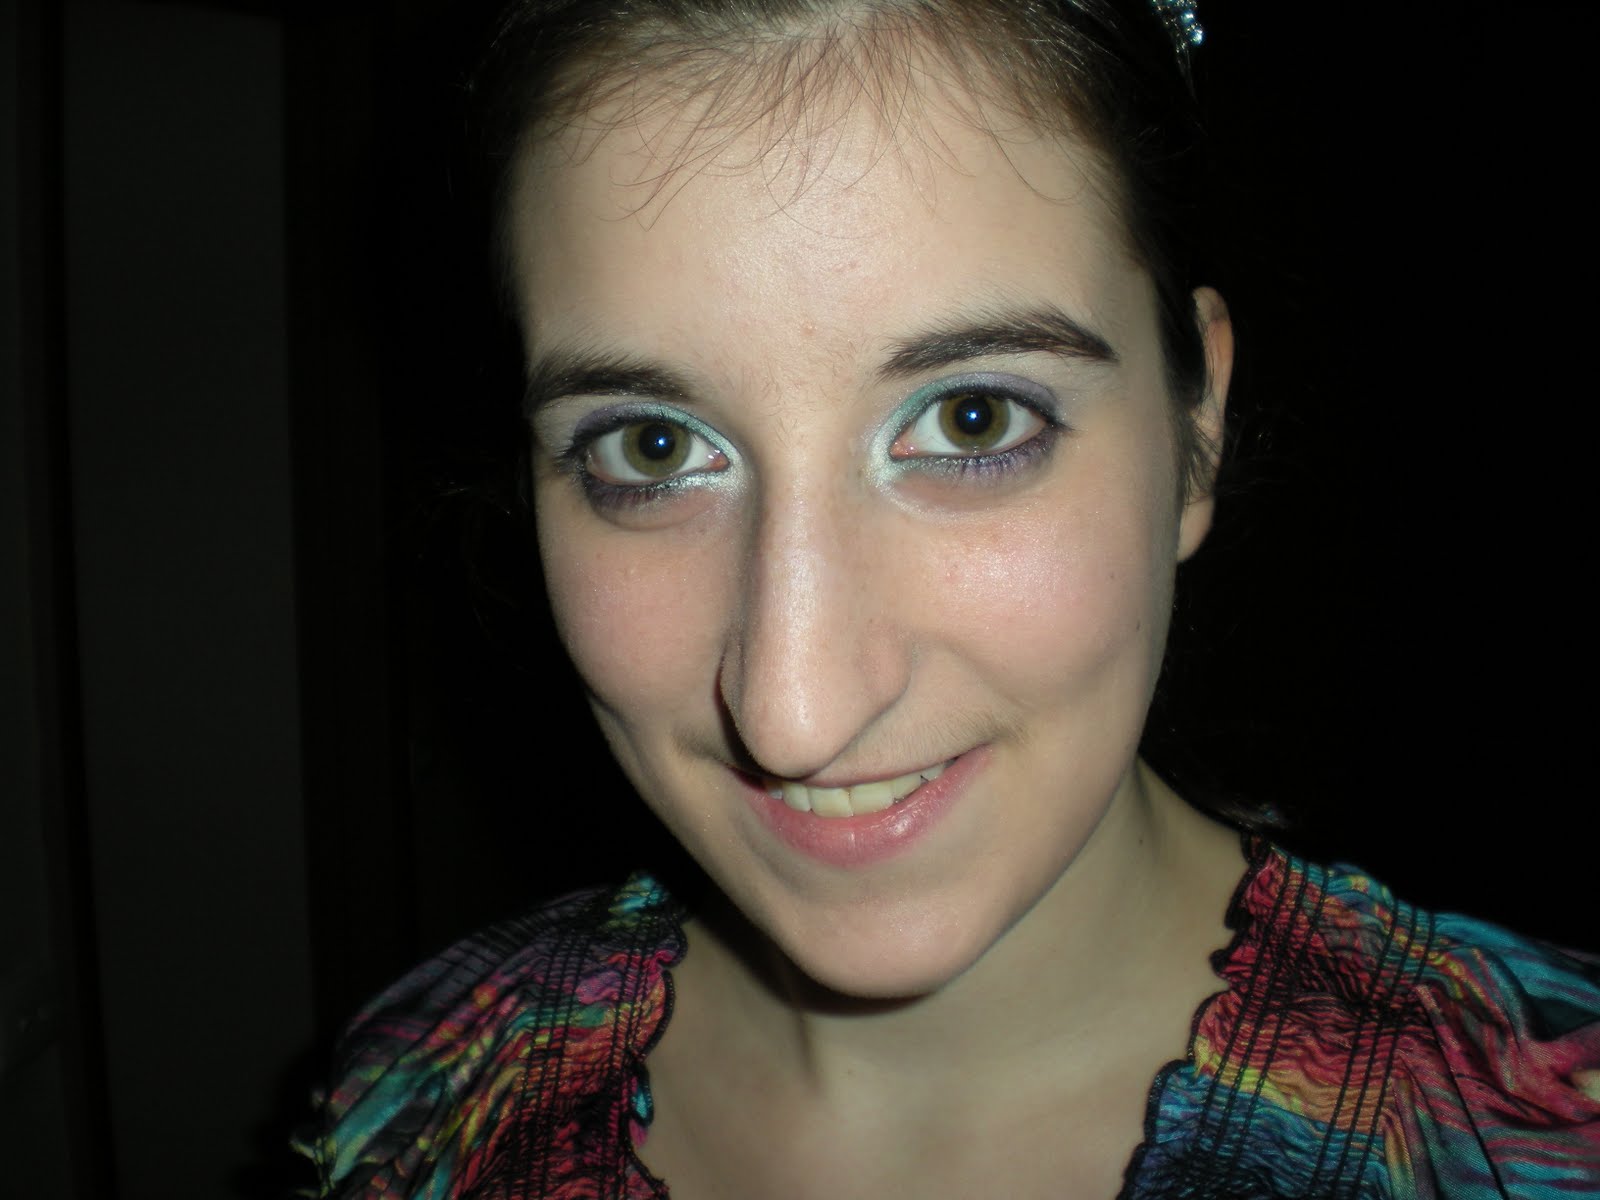
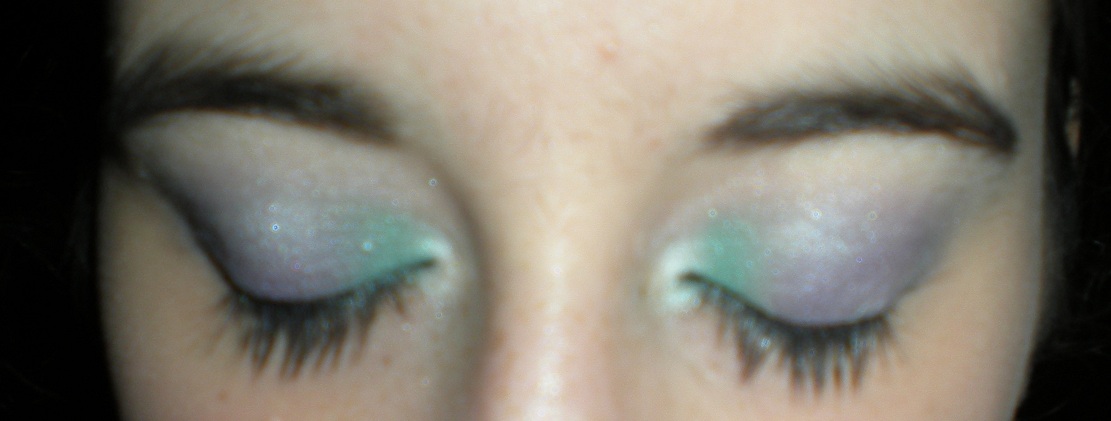
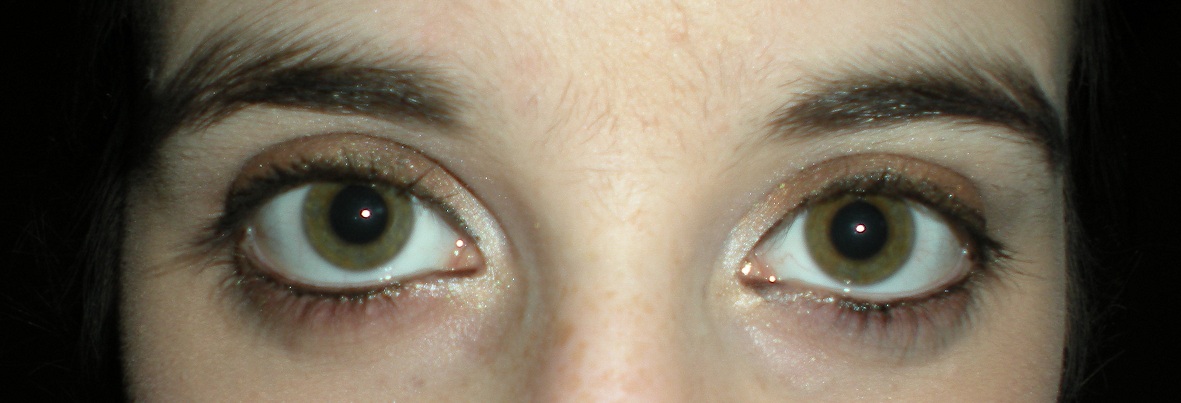
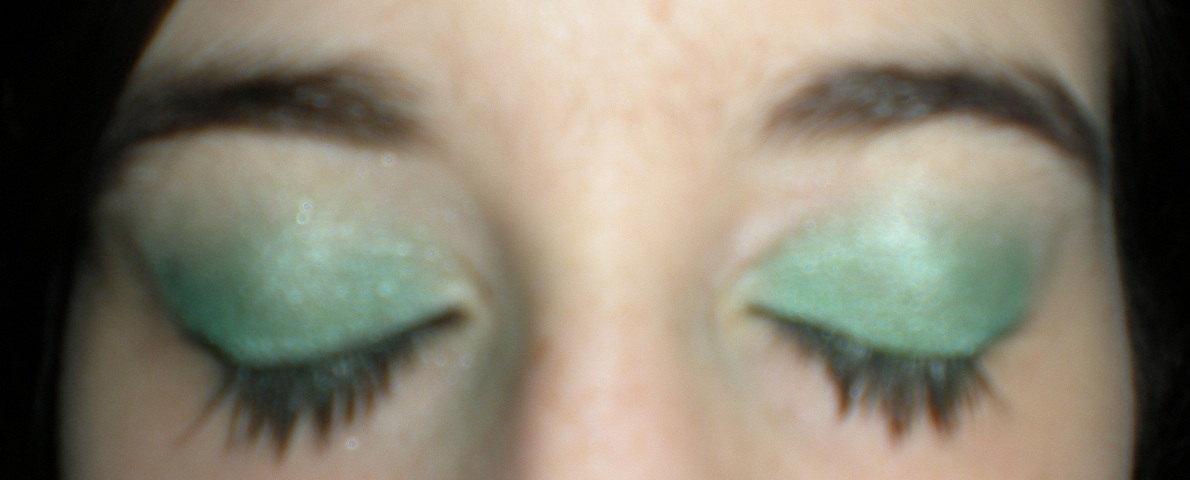
You may notice I used a blue colour for this purple smokey eye. I used this colour on the outer third of the eye and blended it in with the darkest purple shade and black on the outer corner. If you choose to use the same or a similar blue colour, be sure to blend it well as the blue colour can stick out!

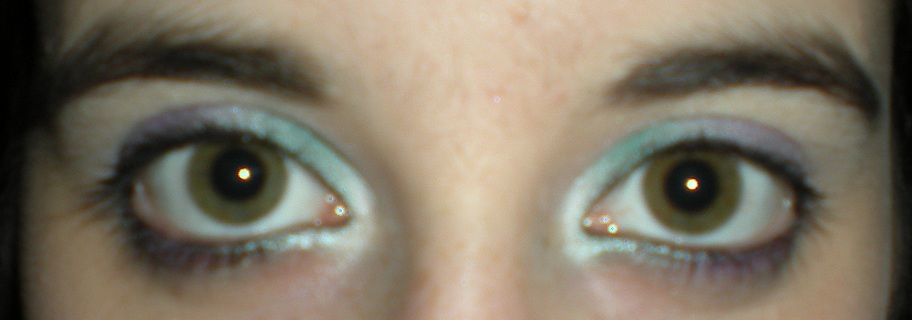
As I was going dancing, I wanted my eyes to look slightly more dramatic than usual, so I immediately chose black eyeliner to really bring out my eyes. If I wanted to wear this look during the day, (which could be a very pretty option for a special occasion!) I would keep the black eye liner on the upper lash line but instead choose a purple or white eye liner for the lower lash line. This will make the look much softer.


For most smokey eyes, it's important to apply eye shadow on the lower lash line...I often forget this step and sometimes my eyes don't always look 'complete'. I like to think of my lids as a frame and my eye ball as the painting...without the lower lash line (or the bottom of the frame), the frame is not a frame. It sounds rather corny, but it helps me remember! 

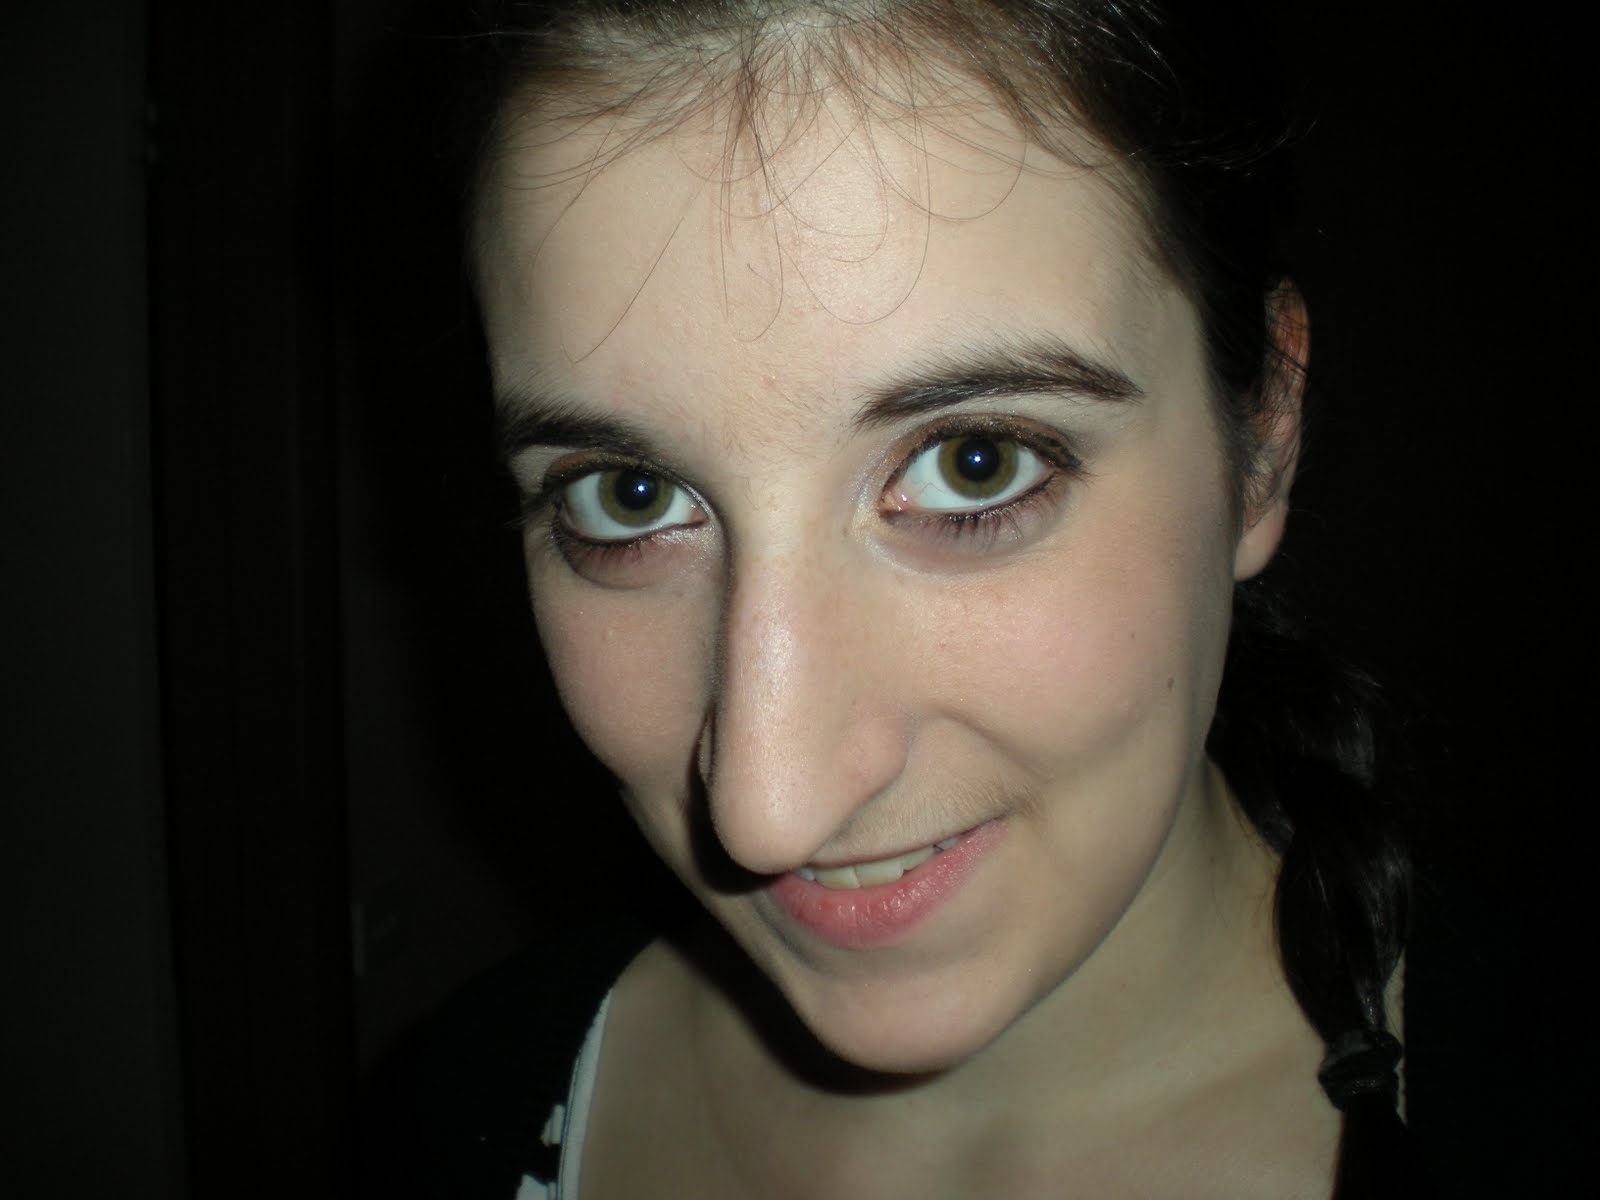
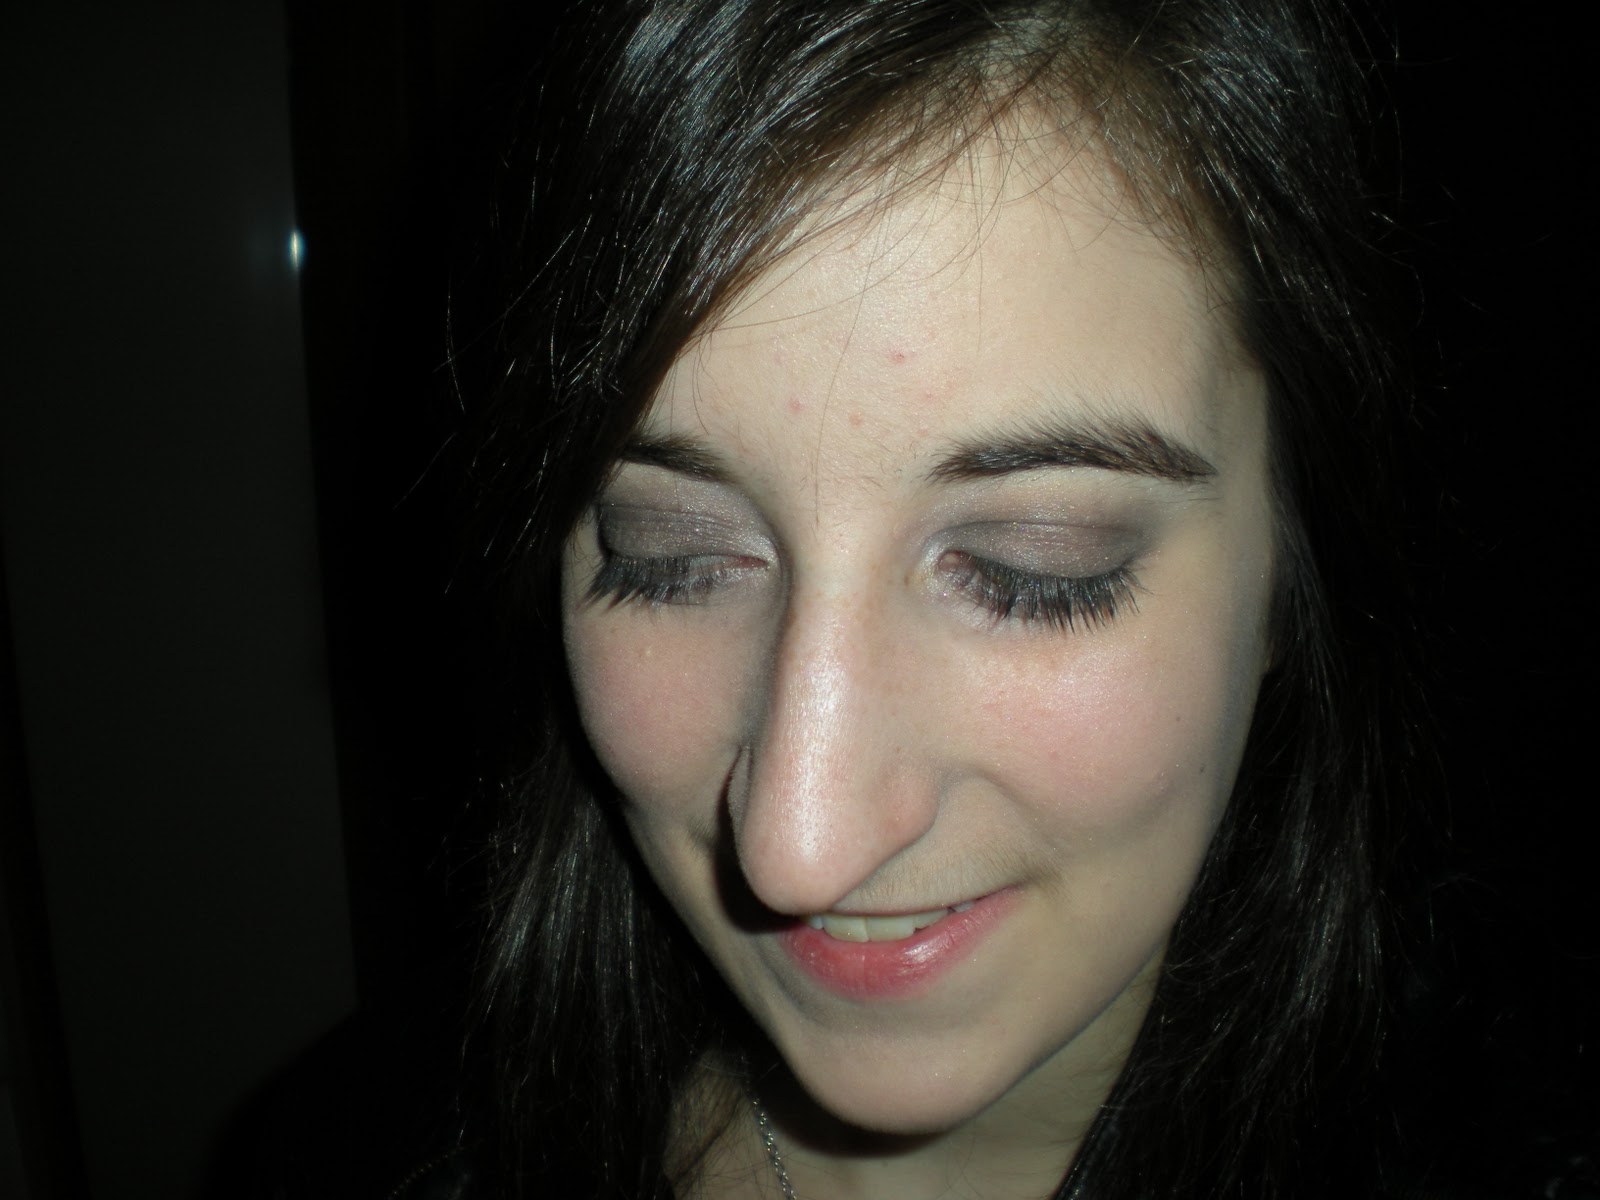
For the lips, I just applied strawberry lip gloss. Light pink or a nude colour lip will also work for this. I used a natural pink blush. I used a pink toned blush for most of my looks as it is the most natural. 

I hope you enjoyed this look! I had a lot of fun testing different colours and trying out some pinks! (I will get over it now...I promise :P) 

There is heaps more to come so stay tuned. If you have any suggestions regarding my blog or even specific looks you would like me to try let me know! I'd love to give it a go! :) 

Melissa xox

Wednesday 27 April 2011

Mini Update...

Hello!
This is just a quick post to update you on what I've been doing lately. Well in terms of make up...nothing new unfortunately! I don't have any interesting/new items to share with you. With uni and work taking up a lot of my time now days, I find it hard to get out to the shops and purchase something new. I am, however, planning on a make up trip soon to use my Myer gift which I haven't spent yet. I can warn you all now, it will probably be a MAC product of some sort, unless you have any specific product or brand ideas-I'd love to hear them!

After Easter Sunday, it's safe to say that I am still full from the insane banquet I was fed. Not to say I didn't enjoy it. It was delicious! However, my body has been craving exercise to work off that 'bloated' feeling (too much info?). My exercise has become really important to me. Ballroom dancing is a huge part of my exercise...actually it's pretty much my only form of exercise. It's a great work out for the heart and has been a main contributor to the improvement in my balance and most of all my confidence. Currently I am at a silver level, and I can't wait for Gold...my main reason is so I can wear the pretty costumes! (They're so pretty!) I've been dancing for over two years and I LOVE it! (For those that aren't aware, the levels after beginner are: bronze, bronze bar, silver, silver bar, gold etc)

In other news, my piano exam is quickly approaching, which means lots and lots of practise! For those who don't know, I am currently preparing for my A.mus A in piano, which is a performance exam. I am required to perform for 40 minutes with an additional component which involves the examiner asking me questions about the pieces I've played, the composers and the development of the piano. It's a hard exam but I have been preparing for it for a very long time, so I'm determined to be ready. :)

Finally, I would like to say a big hello to my new followers-thanks heaps for following me and I hope you're enjoying the blog! :) If you have comments/questions about anything make up related or in general, please don't hesitate to contact me, I'm usually more than willing to discuss most topics. :)

There is much more to come, so stay tuned!
Melissa xox

Sunday 24 April 2011

Dancing the Night Away...

Hello!
Happy Easter everyone!! Hope you all had a lovely day filled with chocolate, family and love. :) My Easter was extremely consistent in comparision previous years. Family is a huge part of my life as we often take time out of our busy lives to see each other. Our gatherings are always a lot of fun and today was no exception. After a big lunch and PLENTY of chocolate, I think it's safe to say I've had enough food to last a life time! Please let me know about your Easter, I'd love to hear everyone's individual experience. :)

Let's journey back the the beginning of April. I have mentioned in previous blogs that I participate in both Ballroom and Latin dancing. Every term we have achievement days, or 'exams'. I completed an exam earlier this month and afterwards had the opportunity to be presented with my trophy at the awards night. Being the make up obsessed person I am, I'm always excited to experiment with my make up and create dark and dramatic looks. On the night, I wore a black and silver strapless dress, so I naturally chose a smokey eye.

Not only did I have to do my eyes, but one of my closest friends asked me to do her make up as she was participating in her own exam. She is currently at the level where she can wear costumes, and her costume was a beautiful hot pink. We both agreed on using a variety of pink eye shadows and gradually darkening the shade of pink towards the outer corner. I used a combination of matte and shimmer pink colours, with a white eye shadow of on the brow bone and inner corner.

I have photographic evidence of my handy work and I hope you enjoy it. I thought this would be a good opportunity to showcase the talents of another close friend of mine who is a fantastic hair stylist!


I hope you enjoy the photos, please feel free to leave a comment and let me know what you think! I have plenty more looks to come, including a blue smokey eye as well as a purple smokey eye with a twist! :)
Melissa xox.

Monday 18 April 2011

What To Wear To Work Part 5

Hello!
I'm sorry for the delay in blog posts, everything has been really busy and I haven't had a chance relax! It is finally school holidays so I am off from work for the time being, but I decided to glam up more than usual before holidays and experiment with slightly darker bronze and chocolate brown colours.
This is what I came up with...

I also experimented with my hair, curling it and then pinning everything to side and putting on a very pretty headband! (I love pretty things!)


This look was very simple to achieve. I only used two colours with an additional cream colour on the brown bone. 


I firstly applied the bronzed colour on half of the lid, then I applied the chocolate brown colour on the outer corner. It looked strange at first, as they are both very different colours, but once it was blended, it was very effective.


It is entirely up to you whether you wish to apply black or brown eye liner to the upper lash line and waterline.  Ordinarily, I wouldn't use black eye liner when going to work, but as long as it's not too dramatic I can get away with it. :)


If you are wondering, I purchased the headband from Diva and used my 88 coastal scents ultra shimmer palette for my eyes.

If you have any additional questions regarding this look please don't hesitate to leave a comment! I'd love to hear your feedback!

Plenty more to come, so stay tuned!
Melissa xox

Monday 11 April 2011

Redo of a Previous Look-Half rainbow Eyes

Hello!
Hope you all had a fantastic weekend. I was lucky enough to spend Sunday with my lovely boyfriend, which put me in a good mood for Monday morning uni!

This post is mainly going to showcase my NEW ultra shimmer 88 coastal scents palette! It's an understatement to say I was a little excited to receive my package in the mail as this has been on my wish list for a few months now! This is what the beautiful palette looks like...(as well as the colours chosen to achieve the look)

The colours in this palette are beautiful. You have every colour imaginable and so I wanted to redo one of the looks I did by using shimmer colours only. I was happy with the finished product as the colour applied really well with minimal fall out.

If you wish to achieve this look, refer to the tutorial I did in March. (I'm wearing the same dress as well! :P)


Sunday 10 April 2011

What to Wear to Work Part 4-Bronzed Brown Eye

Hello!
By now, you probably would have discovered that I love my using brown eye shadows, especially for work. I often wear a lot of black and greys to work, so I often try to avoid smokey black eyes and opt for simple bronze and brown colours. I have posted a similar look to this one, however I wanted to showcase my coastal scents 88 warm palette. I'm in love with this palette, however was a little disappointed when it arrived as some of the colours were cracked and not intact. Thankfully, I'm still able to use all the colours...I'm glad as I love this palette!
This is the look I created.
I should also mention my attempt at liquid liner. I've always found this difficult to do but I'm working on it! I often find that I'm in a rush, due to lack of time, when I'm putting on my make up, so liquid liner is not always my first choice when lining my eyes.

The warm palette...
Steps to achieve this simple look...

1. Apply your base/primer to ensure your make up lasts throughout the day.

2. Apply a highlight colour-an off white eye shadow would work well with this look.

3. Apply the bronze colour all over the lid. Avoid the inner corner.

4. Apply the highlight colour on the inner corner. This will make the eyes appear brighter and more awake.

5. Choosing a dark brown eye shadow, apply this all over the lid. This will tone down the bronze colour.

6. Blend the eye shadows. The bronze colour should still be visible on the eye but should be very subtle. The bronze colour gives this look an extra dimension to the eyes.

7. Apply liquid liner on the upper lash line. Line your waterline with black eye liner. If this is too dramatic for work, replace the black eye liner with white eye liner. If you don't have this, then you can skip this step.

8. Apply mascara then you're done!

I completely forgot to apply lipstick when I took these photos, but in terms of lip colour, I would stick to light pinks, nude colours or even lip gloss.

When I'm wearing bronzed/brown eyes, my skin usually appears more pale so I like to wear more bronzer than usual, so I appear tanned. :)


I hope you enjoyed this look! Please feel free to leave a comment and provide suggestions. I'm also up for a challenge if you have a particular make up style (e.g. celebrity make up) that you would like my to try, please let me know! :)

There is more to come, so stay tuned!
Melissa xox.

Saturday 9 April 2011

Especially for Hazel and Green Eyes...

Hello!
Hope you're having a fantastic weekend! It's a little cold in Melbourne at the moment. The weather here is always so strange. One minute the sun is shining, the next minute it's pouring rain. You learn very quickly to take an umbrella with you everywhere you go!

I was bored one afternoon this week and decided to experiment with the colours I haven't really used in my coastal scents 88 matte palette (which I am still LOVING by the way!). I realised I avoided the green colours and I was baffled as to why that was! I have hazel/green eyes, so I assumed that green tones would suit the colour of my eyes. I attempted a semi-smokey bright green eye look.
Here is how it turned out...


The steps I took to achieve this look were very similar to "Icequeen inspired" bright blue look I came up with. I won't provide the description but if you would like one, just follow the Icequeen tutorial. :)

The palettes I used...


  • The white colour in the stylish smoker's by Maybelline (far right photo) was used as a highlight colour. 
  • The shimmery green colour (in middle photo) was applied lightly all over the lid to add some extra sparkle. :)


I hope you enjoyed this look. I have noticed since I've been blogging, I've been stepping out of my comfort zone as I keep trying new colours and various different colour combinations! Please let me know what you think, don't be afraid to leave a comment-I would love some feedback!
Plenty more to come so stay tuned!
Melissa xox.

Friday 1 April 2011

An Odd Combination...

Hello!
Happy April Fools day! I hope you weren't the target of any mean practical jokes today. I was lucky enough to be inside attempting to rid myself of a horrible cough that I developed the day before. I was also resting up as I have a dancing exam as well as a wedding tomorrow! If it's any day that I have to be wide awake and enthusiastic...it's tomorrow! Don't worry, I've already planned my make up...Ish. I'll let you know what I have decided tomorrow!

A few days ago, I had a dancing lesson and social and decided to wear a blue top. I had recently worn my bright blue 'icequeen' look and didn't want to go down that road again. I was pretty confused, so I decided to stick to a light brown look, hoping it would blend well with the blue colour I chose to wear. I finally chose a bronze colour and applied that all over my lids. I realised this was too dark, so I randomly chose a matte silver colour to apply over the top. It worked surprisingly well! It toned down the bronze and still worked with the blue that I was wearing. With a little bit of black eye liner on the water line, I was ready to head out. :)


Hope you enjoyed this blog post, be sure to let me know what you think! I'm also up for a challenge. If you think of anything you want me to try, let me know!
More to come so stay tuned. :)
Melissa xox

What To Wear To Work Part 3- Basic Brown Eye

Hello!
I had dinner with a close friend a few days ago and didn't want to overdo the make up. I also wanted to put a little effort in as Uni homework had diminished significantly-woo!!-and I felt like putting in more effort. Thus, I came up with a simple brown and slightly smokey look. It's perfect for work as it's not too dramatic!
Here is how it turned out:
I know, my camera is not the best, but the main thing I wanted to point out was the use of white eyeliner on the water line. Whenever I'm feeling a bit on the tired side and want my eyes to appear wider and brighter, I apply white eye liner. White eye liner is also much more subtle than black or brown eye liner so it may suit people want to tone down their make up.

This look is great if you don't have a lot of time to do your make up. I applied a dark brown all over the lid and then a lighter colour on the centre of the lid. To define my eyes, I applied brown eye liner on the upper lash line and of course, white eye liner on the water line. The lightest colour in my coastal scents 88 matte palette was used a highlight colour.


I hope you enjoyed this look! If you have any comments or additional questions please don't hesitate to ask. :)
Hope you have a lovely weekend, there is heaps more to come so stay tuned!
Melissa xox