Thursday 3 November 2011

Navy

Hello! 
Here are some recent looks I have created. I am quite fond of the second one personally...It actually looked better in person!
Option 1...


Option 2...
Hope you like!! 
Melissa xox

Monday 5 September 2011

All Natural-August Favourites

Hi everyone!

So today I just thought I would share my favourite products that make my skin look as natural as possible. As we head into Spring, I thought I would share my favourite products which got me through this cold winter!

I firstly use a primer on my skin, to ensure that my skin is protected from the foundation and powder. I'm loving the moisturising primer from the body shop. If my skin is extra dry (it usually is in winter), I apply a facial moisturiser prior to applying primer. I let it all absorb into my skin before I put all my make up on though!!


I almost always apply foundation to my face. I find that foundation helps keep my skin clear and even. Along with Mac concealer I feel that this combination works well in making my face feel fresh.

I apply both a pressed powder to set the foundation as well as bronzer. I apply this all over the face as I am quite pale. Recently, to achieve a "summery glow", I applied fake tan, which made my body look tanned but created a vast contrast to my face! To combat this, bronzer helped my body's skin tone look the same.

Unfortunately I have run out of blush, so I have resorted to using light pink eye shadow as blush. I never use this colour anyway and after about a month, it hasn't caused any break outs, so I'm assuming it's safe to use on my cheeks.


Mascara helps my eyes look more awake. Some Maybelline mascara's work well, but as everyone has different eye lashes thus it's difficult to recommend specific products as everyone will find each mascara different. I have rather long lashes so I like "lash stiletto" by Maybelline.

I hope you enjoyed this brief blog post. If you want to know anything feel free to contact me.

Lots more to come-stay tuned!! :)
Melissa xox.

Wednesday 24 August 2011

After a long day at work....

Hello!
Today, I thought I would show you how long my make up usually lasts. I did this make up in the morning for work and didn't take off my make up til about 10pm. This is what it looked like at that time:

As you can probably see, the gold has faded quite significantly, but you can still see the shimmer. I think the main reason why my make up lasts so long is because I have a really good primer. In addition, it's important to have good quality eye shadows if you want them to last throughout the day. I have purchased some absolutely shocking colours over the years and often, after only a few hours, the colour fades! Most well known drug store brands have really good eye shadow products and of course the expensive brands also sell amazing eye shadows. If you're a student like me and don't want to spend lots of money on eye shadows, I recommend Maybelline, Covergirl and Rimmel. I have had success with all these brands. Coastal scents also sell really great eye shadows!

 I hope you enjoyed this look! Feel free to let me know what you think and if you have any suggestions/comments for my future blog posts.

There is more to come, so stay tuned!
Melissa xox.

Monday 22 August 2011

Superhero and Villains Make up Part 2

Hello!
Welcome to Part 2 of the Superheros and Villains make up! I should stress that this series really isn't a "how to look like [insert superhero/villains name here]" but rather is just my interpretation of these amazing characters. This time, I created the character POISON IVY.

This is the finished look:
As you can see, I decided to focus on the dark eye make up and instead of dressing up as Poison Ivy, I thought I would recreate the vine on my forehead as well as draw another vine on the right side of my face, towards my chin.

Here are the steps I took to create this look...

1. Start with the eyes. Apply a primer. I find that the eyeshadows (whether cream or pressed) last longer if you have a primer on as a base.

2. To achieve dark dramatic eye makeup, I applied a cream shimmery black eye shadow. I used After Midnight by Jessie's Girl. To set, use a matte black or shimmery black to set the cream.

3. Choose a chocolate or 'dirt' brown colour and apply this along the crease area and with this create a light cat eye. I used the brown instead of black because I didn't want it to be as strong. We are Poison Ivy after all-not Catwoman!

4. Choose a frosty white colour and apply this just under the brow. You want light to catch this area.


5. Using the same brush you applied the black colour with, bring this colour down towards your lower lash line. Using this brush or a liner brush, line your lower lash line with the black shadow and join it up with the upper lash line shadows. It doesn't have to be neat-in fact, I encourage you to smudge it...villains probably don't have time to create super complex looks. :P

6. Line your upper and lower waterline and apply mascara. False eyelashes are optional, but if you want that extra wow factor, go for it! :)


7. Now it's time to do the vine. Take any black eye liner. (I used a black glitter eye liner by Jessie's girl) and draw a vine, adding leaves where appropriate. Then, take your liner brush and choose a bright green colour and trace along the vine. I used a black eye liner so the vine could stand out and the green eye shadow could have something to stick to.

8. It's important to have bright lips in this look. I encourage a deep red matte lipstick or even a lip gloss would work fine. Anything that screams "I'm confident and bad-ass". In my opinion, the colour I chose was too 'orange' for this look.

I hope you enjoyed this look. It's always fun to do something out there and different! If you have any questions/comments, please leave a comment below or message me via email (beautifulyetbasic@gmail.com) or twitter @mgmusic91)! I love hearing anything from anyone! :) If you have any additional suggestions for more superheros or villains, let me know-I'm happy to try most things. :)

Have a fantastic week and I shall be blogging again very soon!
Melissa xox.

Tuesday 16 August 2011

Pretty Purples

Hello!
I had too much time on my hands so I decided to create a purple smokey eye. It was super simple! Just choose three colours, apply the lightest on the inner corner, the middle colour on the middle of the lid and the darkest colour on the outer corner. If you want it to be extra dark apply black on the outer most part of the eye. Use the same colours on the lower lash line. Don't forget to apply black eyeliner and mascara!
Piece of cake!! Mmmm cake. :D

If you want the full instructions on how I achieved this...I have already done a tutorial on it but if you want even more details about this look (or even my hair-I used my Remington curling iron) just let me know!

Plenty more to come so stay tuned :)
Melissa xox.

Sunday 14 August 2011

What a different colour base can do...

Hello!
I had dancing a few days ago and I thought that I would use "free as air" from MAC as a base (creamy blue eyeshadow) and apply a completely different colour on top.

Here is what I came up with...


As you can see, I used an emerald green colour and yet it turned into a lighter green, almost turquoise colour on my eyes. This is due to the blue base. So, if you have a bright coloured base, try pairing it with a completely different colour and see how it turns out. You might be pleasantly surprised! 

After apply the green all over my lids, I decided to apply two gold colours to highlight my inner corner. I thought gold would complement the green well. You might want to use it for an 'Australia Day' party! 

 I applied a shiny pink lip gloss to finish off the look. Anything too dark will take away from the eyes. 

I hope you enjoyed this look. I have other options that I have come up with after applying a blue base on. After receiving my 'Jesse's girl' products I have a few more creamed based products I am eager to try! 

Feel free to leave a comment below if you have any questions/comments! 
Thanks for reading! 
Melissa xox. 

Friday 12 August 2011

INSANE MASSIVE HAUL/WINTER FAVOURITES!

Hello! 
Ok so I know I haven't blogged for sometime but life has been SO BUSY I haven't had much time to myself. I have had however, some time to go shopping (woo!) and purchase some new make up and beauty products. There is quite a lot to get through so I shall begin right away!

My first purchase was was a nail growth product. I have absolutely horrible nails and because of my piano career, I haven't bothered to grow or look after them. After my latest piano exam I decided to take a break from piano and I wanted to invest more time into the care of my nails. Thus this recent purchase. I am unsure if this product actually does work as my nails grow at a normal rate...however they make my nails look shiny and pretty haha. I will have to keep you updated on this one...

Hairspray is extremely important when I style my hair. I always use hairspray when I am curling or styling my hair in any way (mainly because if I don't, it'll drop super quick!) Enter my lifesaver....
Recently, I had a bad experience with this hairspray...it leaked everywhere in my bathroom (and I really mean everywhere) and to this day, I still can't work out why. I  am tempted to try another brand for a while. It was a really good hairspray, however as it was able to hold curls really well.

Taking make up off is an extremely important step in skin care and I want to make sure my make up is not only taken off completely, but doesn't ruin my skin
I have trusted the Johnson Brand for quite some time...and when they're in a pack I get super excited because that means I get more for a better price! Woo! These make up wipes are specifically for dry skin and I like the way my skin feels after I remove my makeup.

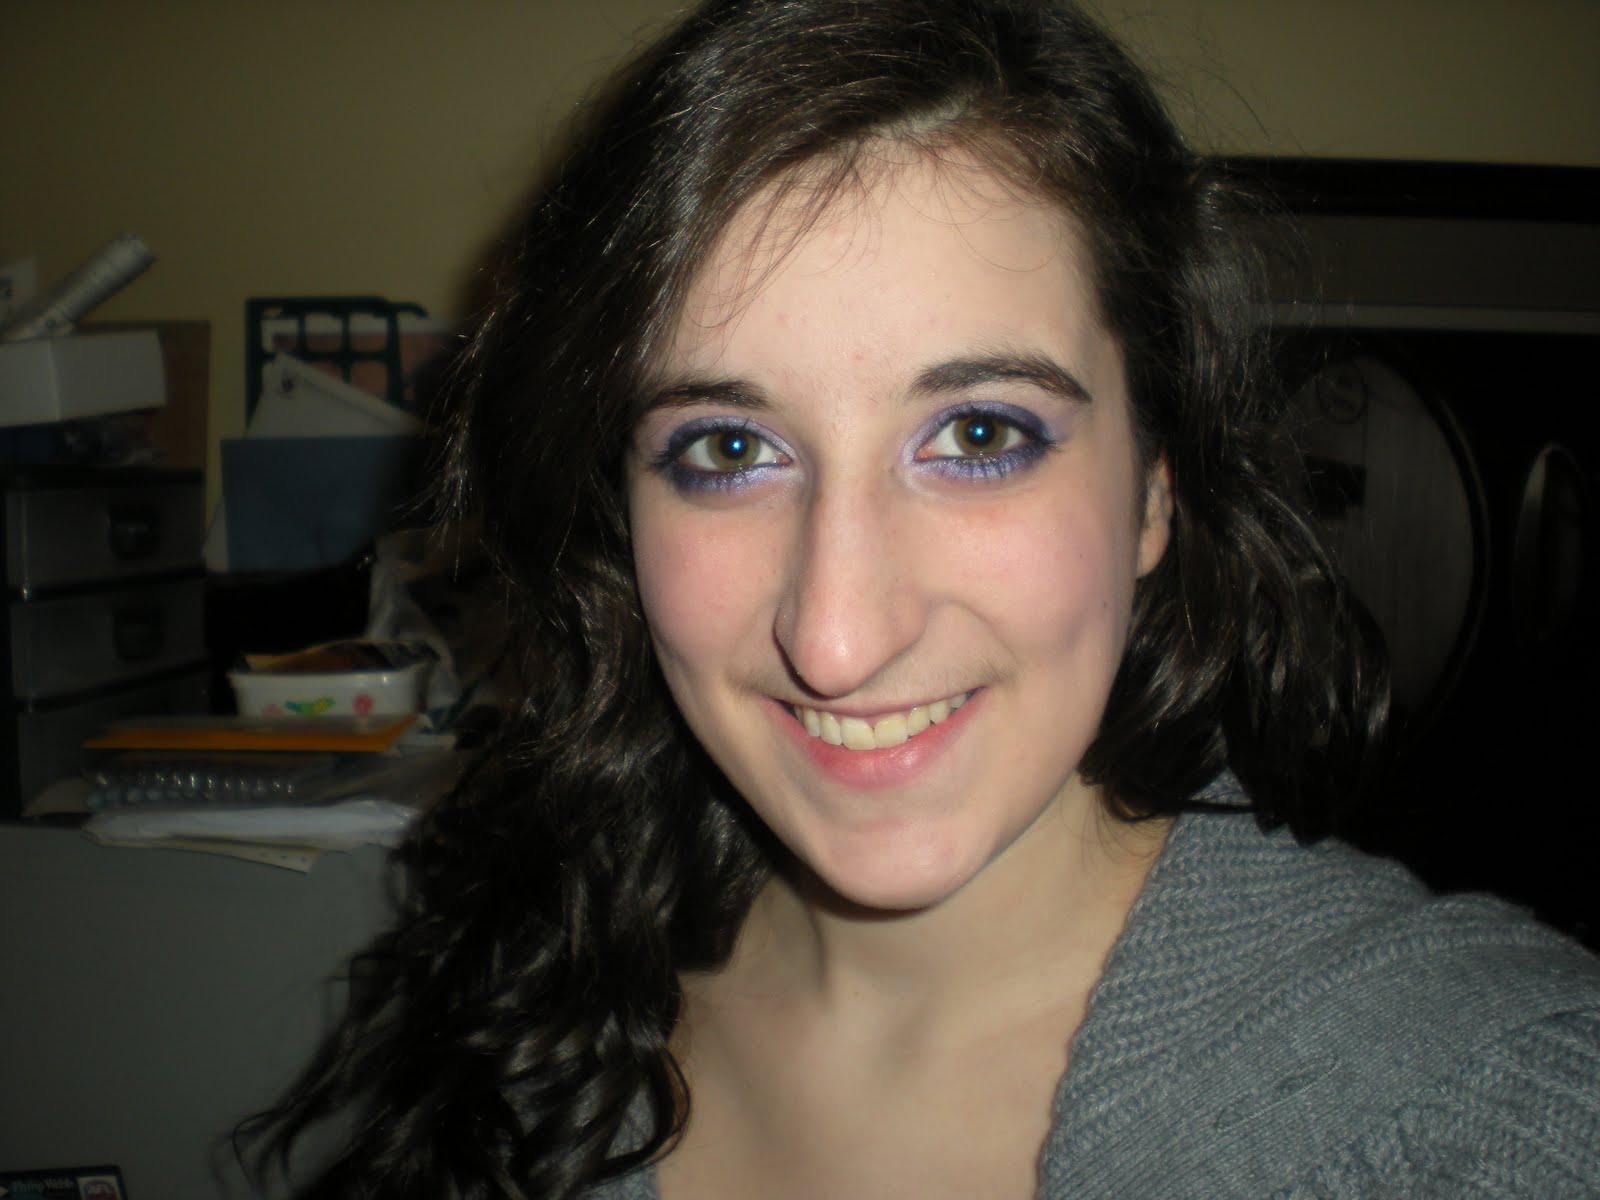
I have shown the results of my hair curling attempt, but I didn't show the product that helped me achieve the look...
I am falling in love with this Remington curler...especially when the price was so cheap! I've used it for a few months now and it's still working well!

I have many make up palettes, but when I was in Target, this particular palette caught my eye...
This palette has 154 colours all together. There are 77 eye shadow colours (on the left) and 77 lip colours on the right. I don't have a lip palette, so as you can imagine I was pretty pumped! I have been loving the lip colours so far, but being an extremely cheap palette (purchased for $30), I was a bit disappointed with the quality of the eye shadows. To achieve the colour in the palette, I had to place a LOT of colour on my eye. While I don't use the eye shadows as much, the lip colours are beautiful!

I had to purchase new foundation as I was running out of my old one. I use the body shop foundation and pressed powder and had the buy more because it's so amazing! The shade I wear is number 3.


Whilst I was in the body shop purchasing my super awesome face products, the lady serving me was SHOCKED that I didn't use face primer. I hadn't been aware of the purpose of face primer at the time so I was a bit offended that she acted that way towards me. She then showed me this...

It is face primer with moisturiser in it, so it not only creates a barrier between my skin and the make up but also moisturises it as well. I have been able to tell the difference. My skin has been a lot clearer and smoother. Winning!

The most recent lip product I have purchased has been from Max factor. This beautiful colour is the only lip stick that I use ALL THE TIME. I am not a fan of lip sticks, just because they stick to my teeth and they just taste disgusting. I much prefer shiny lip glosses that taste fruity haha. However, this lip stick ticks all the boxes for me. It's a light pink colour, so it's quite subtle, doesn't taste horrible and stays on for a long period of time!

Now on to eye shadow. I was in MAC a few weeks ago and I came across this new make up collection called Big Bounce. They were all cream eye shadows. As they were a limited edition to MAC, I thought I should purchase some! I purchased them for $34 each. 

The light brown is called "Trophy" and the blue is called "Free as air". They are both fantastic colours to use! I use Trophy as a base, a highlight on my cheeks and just a quick eye shadow if I am in a rush. I use the blue as a base or a quick eye shadow as well. I absolutely LOVE these colours, so I highly recommend them!

Last but not least is my most recent purchase, which I received in the mail today! I purchased it from Jesse's girl cosmetics and I must say online shopping is soooooooooooo much cheaper than shopping in Australia. I bought 4 products for $22! Woo! I think I have been  officially converted to this craze. This is what I purchased...


I bought three cream eye shadows in black, blue and purple as well as a black glitter eye liner with an in built sharpener! How cool is that???!?! You have to be kind of careful though as you can easily start to sharpen the eye liner. I have learnt from my 'almost' mistake. These cream eye shadows are beautiful and extremely easy to apply. I would suggest a brush to apply them as you can apply the shadows on quicker. 

I hope you enjoyed this MASSIVE haul post! Please let me know what you think! If you have any questions, don't hesitate to contact me, whether it be by email, twitter or posting a comment below! 
Thanks for reading-I really appreciate it! 
There's so much more to come so stay tuned!! 
Melissa xox.